Finding mould on your walls is one of those things that turns a normal Tuesday into a cleaning emergency.
The dark patches spreading across a corner, the musty smell that greets you at the door — it’s unpleasant, and if left alone, it only gets worse.
The good news: most wall mould is perfectly manageable with the right method and a bit of elbow grease.
This guide walks you through exactly how to remove mould from walls safely whether you’re dealing with painted drywall, bathroom tiles, or wallpaper and how to keep it from coming back.
Why Does Mould Grow on Walls?
Mould is a fungus. It reproduces by releasing tiny spores into the air that land on surfaces and grow when conditions are right.
Those conditions are simple: moisture, warmth, and something organic to feed on.
Your walls provide all three — especially in bathrooms, kitchens, and any room with poor ventilation.
The most common causes of wall mould include:
- Condensation — warm, moist air hits cold walls and the moisture condenses
- High indoor humidity — common in homes without extractor fans or ventilation
- Poor insulation — cold exterior walls create cold spots where condensation forms
- Water leaks — from pipes, roofs, or windows letting in rainwater
- Rising damp — moisture moving up through foundations into walls (common in older homes)
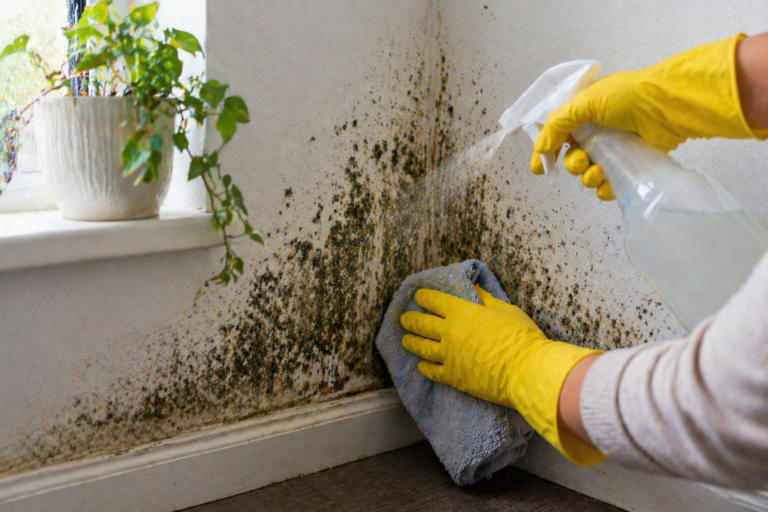
Is It Safe to Clean Mould Yourself?
For small patches — generally less than 1 square meter — yes, you can safely handle it yourself with protective gear and the right products.
You should call a professional if:
- The mould covers a large area (bigger than a bath towel)
- It keeps coming back within weeks of cleaning
- You suspect it’s behind walls or under flooring
- Anyone in the home has a weakened immune system, asthma, or severe allergies
| ⚠️ Warning: Before cleaning, always wear rubber gloves, safety glasses, and an N95 mask. Mould spores become airborne when disturbed and can irritate your lungs, eyes, and skin. |
Before You Start: Set Up the Area
A little prep makes the job safer and more effective.
- Open windows and doors — ventilate the room as much as possible.
- Turn off central heating or fans that could spread spores to other rooms.
- Move furniture away from the affected wall and cover items you can’t move with plastic sheeting.
- Lay old towels on the floor to catch drips.
- Put on your gloves, mask, and eye protection.
- Fill a bucket with warm water and have paper towels or disposable cloths ready.
Method 1: White Vinegar (Best for Painted Walls, Mildest Option)
White vinegar kills around 80% of mould species and is a safe, non-toxic starting point for painted walls.
It won’t bleach your paint or damage most surfaces, making it ideal for a first attempt.
What You Need
- Undiluted white vinegar
- Spray bottle
- Soft brush or old toothbrush
- Clean cloths or paper towels
Steps
- Pour undiluted white vinegar directly into a spray bottle — do NOT dilute it.
- Spray generously onto the mouldy area. Don’t be stingy.
- Let it sit for at least 1 hour to penetrate and kill the mould.
- Use a soft brush or toothbrush to scrub the affected area in gentle circular motions.
- Wipe away the residue with a damp cloth.
- Do not rinse — leaving a thin coat of vinegar on the wall discourages regrowth.
- Allow the wall to dry completely.
| 💡 Pro Tip: The vinegar smell fades within a few hours. You can place a bowl of baking soda nearby to absorb any lingering odor. |
Method 2: Baking Soda Paste (Good for Scrubbing Surface Mould)
Baking soda is a mild abrasive that lifts mould stains and deodorizes the wall at the same time.
It’s especially useful for textured surfaces where mould gets into the tiny grooves.
Steps
- Mix 1 teaspoon of baking soda with 2 cups of water in a spray bottle and shake.
- Alternatively, mix baking soda with just enough water to form a thick paste.
- Apply to the mouldy surface and let it sit for 10 minutes.
- Scrub with a brush and wipe clean with a damp cloth.
- Spray a final coat of the solution and leave it — don’t rinse — to help prevent regrowth.
Method 3: Bleach Solution (Best for Stubborn or Extensive Mould on Non-Porous Walls)
Bleach is the most powerful DIY mould killer and works especially well on bathroom tiles, grout, and non-porous painted walls.
It kills mould spores and removes discoloration at the same time.
However, bleach does NOT penetrate porous surfaces like drywall effectively — it removes the stain on top but mould roots can survive below the surface.
What You Need
- 1 cup of bleach
- 1 gallon (about 4 liters) of warm water
- Spray bottle or sponge
- Stiff brush
- Gloves, mask, and eye protection (essential with bleach)
Steps
- Mix 1 cup of bleach with 1 gallon of water. Never use bleach undiluted.
- Apply the solution to the mouldy area with a spray bottle or sponge.
- Let it sit for 10–15 minutes.
- Scrub with a stiff brush, focusing on any remaining dark patches.
- Rinse the area with clean water to remove bleach residue.
- Dry the wall thoroughly with a clean cloth.
| ⚠️ Warning: Never mix bleach with vinegar or ammonia. The combination creates toxic chlorine gas. Always ventilate the room fully when using bleach and take regular breaks. |
Method 4: Mould Wash Concentrate or Commercial Spray (Best for Walls with Existing Paint or Wallpaper)
If you’d rather skip mixing chemicals at home, a commercial mould remover spray is a clean and effective option.
Look for products that contain a biocide — these kill the mould organism rather than just bleaching the stain. The mould will return quickly if the spores aren’t actually killed.
Top US options to look for include:
- RMR-86 Instant Mold & Mildew Stain Remover — fast-acting, often works in under a minute
- Concrobium Mold Control — kills and prevents without bleach, great for painted surfaces
- Tilex Mold & Mildew Remover — widely available, works well on bathroom walls
- Zinsser Mold Killing Primer — excellent if you plan to repaint after cleaning
Steps
- Follow the product instructions carefully — most require a 5–15 minute dwell time.
- Apply, wait, and scrub as directed.
- Rinse the surface if the label instructs, then dry completely.
Dealing with Mould on Different Wall Types
Painted Drywall
Start with vinegar or a commercial mould spray. Bleach can be used carefully, but avoid oversaturating porous drywall — too much moisture will make the problem worse.
If the mould has penetrated deeply into the drywall, the section may need to be cut out and replaced.
Bathroom or Kitchen Tiles
Bleach solution is highly effective on non-porous tile surfaces. Apply with a spray bottle, let it sit for 15 minutes, scrub, and rinse.
Pay extra attention to grout lines, which are porous and can harbor mould deep in the surface.
Wallpaper
Mould removal on wallpaper is tricky because moisture can loosen the adhesive and peel the paper.
Use a very lightly sprayed commercial mould spray or a barely-damp cloth with baking soda. Work quickly and dry the area immediately.
In many cases, severely mouldy wallpaper needs to be removed, the wall behind it treated, and fresh wallpaper reapplied.
Textured or Plaster Walls
Use a spray-on solution and a stiff brush rather than rubbing with a cloth, which won’t reach into the texture. Work the cleaner into crevices and rinse carefully.
After Cleaning: How to Prevent Mould from Coming Back
Cleaning mould without addressing the cause is like bailing a sinking boat — it’ll fill up again.
Here’s how to make sure it doesn’t return:
- Improve ventilation: Run bathroom and kitchen extractor fans during and after use. Open windows daily, even in winter.
- Control humidity: Aim for 40–60% indoor humidity. A $20–40 dehumidifier in damp rooms makes a noticeable difference.
- Insulate cold walls: Cold surfaces cause condensation. Adding insulation behind exterior walls eliminates the cold spot where mould loves to grow.
- Fix leaks promptly: Any water leak — however small — must be fixed. Mould follows moisture.
- Use mold-resistant paint: When repainting, use a mold-resistant paint like Zinsser Perma-White or Rust-Oleum Mold & Mildew Proof Interior Paint.
- Wipe down condensation: On very cold nights, wipe down windows and cold walls to remove condensation before it soaks in.
When to Call a Professional
Some situations are beyond the scope of DIY treatment:
- Mould covering more than 10 square feet (1 square meter)
- Mould that returns within 1–2 weeks of thorough cleaning
- Black mould that appears alongside musty smells throughout the home
- Mould accompanied by structural dampness or visible water damage
- Any mould exposure causing recurring health symptoms
Professional mould remediation typically costs $500–$6,000 depending on severity and area — but it’s the right call when the problem is beyond surface level.
Frequently Asked Questions
What kills mould on walls permanently?
No single treatment kills mould permanently if the underlying moisture problem isn’t fixed. Vinegar, bleach, or commercial biocide sprays kill existing mould, but it will return unless you address the cause — poor ventilation, condensation, or a water leak.
Can I paint over mould on walls?
No. Painting over mould traps it beneath the surface where it continues growing. Always remove all visible mould, treat the wall with a mould-killing primer, and allow it to dry completely before painting.
Is white vinegar or bleach better for mould?
Vinegar is better for porous surfaces like drywall because it penetrates deeper. Bleach is more effective on non-porous surfaces like tiles. For painted walls, a commercial biocide spray is often the best choice.
How do I know if mould is toxic black mould?
The only way to confirm Stachybotrys chartarum (toxic black mould) is lab testing. Black-colored mould should always be treated with full protective gear regardless. If you suspect a large infestation of toxic black mould, call a professional.
Why does mould keep coming back in the same spot?
Recurring mould in the same location usually signals a persistent moisture source — a slow leak behind the wall, a cold bridge in the insulation, or inadequate ventilation. Cleaning the surface alone won’t solve it. The root cause needs to be identified and fixed.
Can I use a steam cleaner to remove mould from walls?
Yes — steam cleaners are very effective at killing mould spores using heat. The steam penetrates into crevices and kills the mould without chemicals. However, they’re best used on non-porous surfaces and followed up with a mould-inhibiting spray.
Related Articles: